Click on the dropdown menu in the top right corner (next to your username) and then on the Profile button to set the language in which you want to work with Lucy. However, this setting does not determine the language in which invoices are drafted in Lucy. The language of the invoices is always determined by the language set for your client.

In the Settings menu, you manage the core of your environment: from general parameters and users up to the registration of your company on the Peppol network via Lucy. .
How do I open the settings?
- Log in to your Lucy environment.
- Click the dropdown menu in the top right corner (at your username).
- Select the 'Settings' button.

What can you manage here?
Within the settings, you will find the tabs below to optimize your workflow:
General
Logo
Under the 'General' tab, you can add a logo to your Lucy environment. This logo can be replaced or removed at any time.
Display name vs Legal name
- Display name filled in? This name will be shown directly on your invoice.
- Display name empty? Then the legal name will automatically appear on the invoice.
Legal form and VAT number
The VAT number of your company cannot be changed or removed; for modifications, please contact the support team. At the bottom of this tab, you can also find your company's address details.
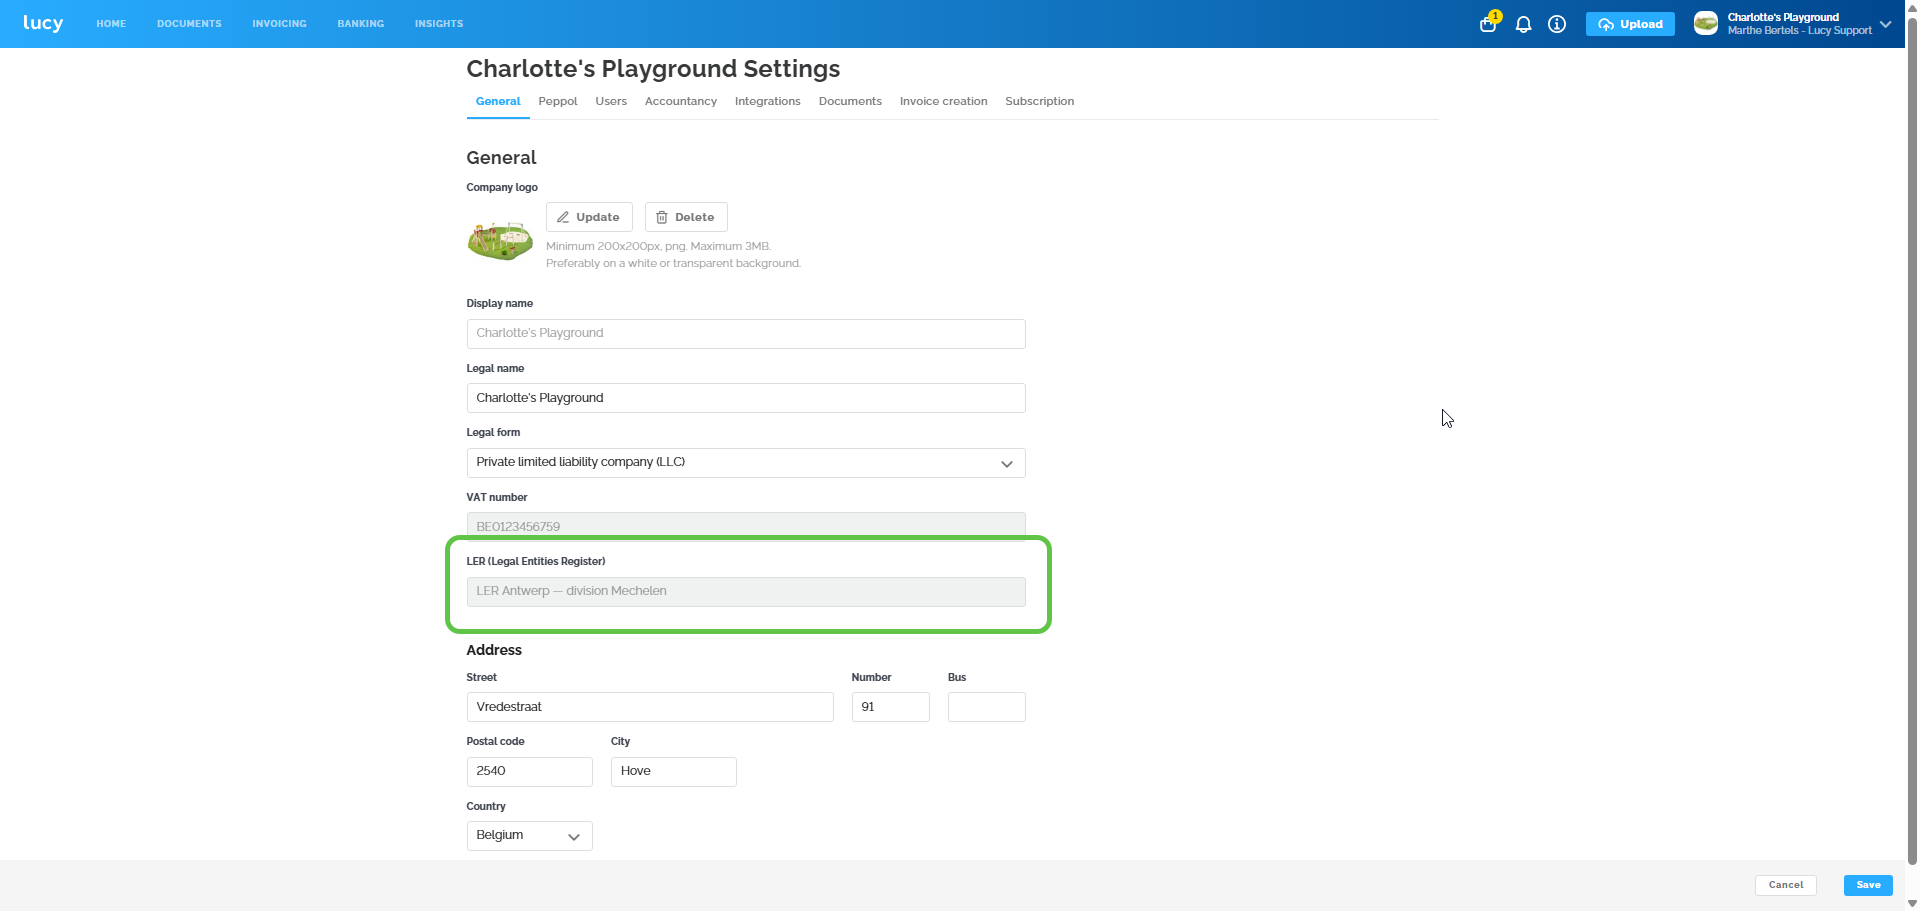
LER (Legal Entities Register)
Is determined completely automatically in the background based on the postal code and, for Brussels, also based on the language of the file/dossier. Both entrepreneur and accountant can change the address, which will adjust the RPR (Register of Legal Entities).
- Sole proprietorships: This field is not visible in your file/dossier.
- Modifying? The field is greyed out and not manually adjustable. As soon as you change the address, RPR is immediately reviewed and adjusted in the background.
Peppol
Managing your Peppol registration
Depending on how your file was created, there are two ways your Peppol registration may be handled:
Via your accountant
Did your accountant register your company on Lucy? If so, the connection to the Peppol network has likely already been arranged for you. In this case, no further action is required on your part.
Register or modify yourself
You can also manage your Peppol network registration entirely by yourself within Lucy. This is useful if you want to switch to a different software or if you still need to initiate the registration.
Follow these steps:
- Navigate to the Peppol tab in your Settings.
- Select the desired checkboxes to register your company directly with the Peppol network.
The information on this tab is managed in real-time by Storecove (our Access Point). The status you see is the actual status on the Peppol network.
 If your company registration number is already registered for receiving e-invoices via another access point on the Peppol network, you will receive the following error message.

You can unsubscribe your company from the Peppol network at any time via Lucy by unchecking the boxes.Note: During the trial period, you can already register on Peppol to receive or send Peppol invoices. Your company will then be officially registered on the Peppol network. Invoices you send via Peppol will be transmitted through Peppol, provided your customer is already registered on Peppol.
Users
Under the Users tab, you can find an overview of all users who have access to your Lucy account. By clicking on the button + Invite User, you can create and invite a new user. Adding an additional user is only possible with Lucy Business and Lucy Business Pro, at a monthly cost of 2.50 euros per month.
After the new user has been invited, they will receive an invitation email.
As soon as the new user logs in to Lucy, their status will change to “Active.”

Accountancy
Under the Accountancy tab, you can check if the connection with your accountant is correct and since when it has been active. If your accountant has registered your file in Lucy, this data is automatically filled in. By enabling the 'Send documents automatically' option, all documents in your inbox will be automatically forwarded to your accounting package.

If you have registered your company yourself via Self-onboarding, you can select your accountant here. If you are not working with an accountant, you can set your own company as the accountant. This is essential to ensure that documents are automatically forwarded to your accounting integration, provided you have enabled this option.

Integrations
Under the Integrations tab, you can connect to your private email address or another package. These destinations automatically appear in the multisender. The available integrations with accounting packages are not visible to entrepreneurs whose files are registered by the accountant in Lucy. This is because the accountant is responsible for setting up the integration with your accounting package.
If you have registered your company through Self-onboarding, the available integrations with accounting packages will also be visible. In this overview, you can see the available integrations, which you can click on to find more information and the necessary steps.These are the existing integrations: Clearfacts, Exact Online, Lyanthe email, Octopus, Winbooks, Exact Online NL, FTPS, Yuki, Wings, Zenvoices.

If Lucy doesn't have an existing integration with your accounting software, it's always possible to set up an email integration, provided that the accounting software has an email address to which you can forward your documents.

Documents
Under the “Documents” tab, you can create rules for automatically sending purchase invoices to specific destinations.
Invoice settings
Under the 'Invoice Settings' tab, you have the option to fill in general information regarding the creation of your sales invoices. Here you can find: the invoice logo, IBAN number, default values, additional information (website, email, phone number), the email address customers can reply to, the general terms and conditions, and the email template. At the bottom of this tab, you can activate automatic reminders.
Subscription
Finally, under the 'Subscription' tab, you can choose your Lucy plan. The different Lucy subscriptions are as follows: Lucy Inbox (not available through Self-onboarding), Lucy Invoicing, Lucy Business & Lucy Business Pro.
Through Compare Plans, you can easily compare the different subscriptions to help you choose the one that best fits your needs.- Do you manage your Lucy subscription yourself as an entrepreneur?
If you registered your company on Lucy during a Lucy discount promotion, you can find both the duration of your current discount and its end date on this page. This way, you can see immediately when the standard rates will apply. If this information is not visible here, no discount applies to your company.
You can activate the desired subscription and finally make the payment via the Pay Now button. 
- Is your accountant responsible for paying your Lucy subscription?
Simply select the subscription that best suits your company by clicking the 'Change' button. Your accountant will handle the billing. If you wish to downgrade from a higher to a lower subscription, please contact your accountant. They can arrange this for you.

Important: During the trial period, it is not possible to select and pay for a paid plan. This will only be possible at the end of the trial period.