At the moment, invoices in Lucy can only be created in Dutch, French, and English. To create an invoice in the correct language, it is important to select the appropriate customer language when creating the customer.
In preparation, you can follow these steps:
- Define settings
- Add clients
- Add sales items
Once everything is set up, you can start creating invoices.
Important: Ensure that the following fields are completed, as they are mandatory:

- IBAN
- invoice numbering
- the email address where customers can respond.

If these fields are not filled in, the settings cannot be saved.
You can find more information about this on this page: Create a Sales Invoice in Lucy.
This page explains the settings. You can find the settings under the “Invoicing” tab in “Invoices” or via Settings > Invoice settings.

Invoice Logo
In the settings, you have the option to upload a logo with a maximum file size of 3 MB. This logo will be displayed on your sales invoices. Currently, it's not possible to adjust the size of the logo on the chosen layout. Additionally, it is not possible to upload multiple logos for different activities within your company.
Payment info
Here you can set up multiple bank account numbers to be displayed on your sales invoices.

Important: Use the tag [IBAN#] in your email template to automatically display bank account numbers according to your settings.
Defaults values
You can set the VAT percentage, due date, and payment method as default values. These settings will be automatically applied to every invoice you create.

The chosen payment method determines what information is displayed on the invoice:

- 'Already paid' method: When you select this option, the invoice will clearly state that the amount has already been settled. Once the invoice is sent, its payment status will also automatically be updated to 'Paid'. This is useful for invoices that have already been paid by card or in cash.

- 'Credit transfer' method: If you choose this option, a payment request will automatically be placed on the invoice. This contains all the details the customer needs to complete the payment via bank transfer.

Footer
You can also set additional footer information here, including the website, email address, and phone number.
 Set up your payment reference type
In the “Payment reference type” section, you can indicate whether you want to add a structured communication to your invoice.

Set up the numbering for your invoices and quotes
The invoice numbering must be set before creating the first invoice. Once the first invoice has been created, the numbering can no longer be changed.
In Lucy, the starting number of your invoice is automatically displayed as a four-digit number. For example, if you enter ‘1’ as the starting number, Lucy will adjust it to ‘0001’.If you want to change the invoice numbering, you can add a new period with the desired numbering. It’s important to assign the correct invoice date to ensure that the proper numbering sequence is applied.
You can set a prefix only once, such as the calendar year or a custom text, along with a chosen starting number. This starting number will automatically increase as new invoices are created. At the beginning of a new fiscal year, you can restart the numbering as desired. In Lucy, it is not possible to set up separate numbering for a second activity.
Using a slash '/' in the prefix is possible, but we reccomend against this because this wil influence the documentnames that will be created.
You can also set up the numbering for quotations. As with invoices, the numbering cannot be changed once the first quotation has been created. You can use periods to adjust the numbering or restart it at the beginning of a new fiscal year.

Important:
The end date of your current period cannot be set to a date in the past. In addition, the start date of your new period cannot be in the past or overlap with a previous period.
General terms and conditions
You can upload your terms and conditions as a PDF file so that they can be sent as an attachment along with the invoice.

Customize your email template
Under the email template section, you can enter your own email address where customers can reply. In addition, you can customize the email text and add extra information for sales invoices, sales credit notes, reminders, and quotations. The email sent to the customer will be sent in the customer’s language.

Activate the option to send automatic reminders
You can send automatic reminders to your customers by enabling this option and setting after how many days the reminder should be sent. It is important to manually ensure that the payment status of the invoices is updated correctly. Only one reminder can be sent per day.
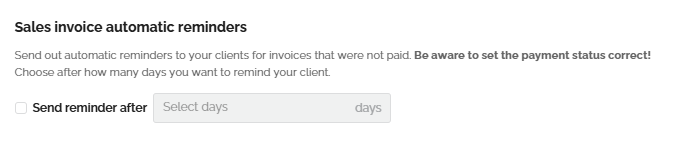
Note: The days must be selected in this field and should not be entered manually.